McCalls has their new summer offerings up, so I thought I'd let you all know which ones I'm really excited about...even if I'll never actually sew one or two of them.
M6346 looks like an easy summer dress I could bang out in a couple of evenings and wear all summer. This will be my first summer in Florida, and I plan to stay as cool as possible. Breezy but not a sack, gotta love it.
M6356 has some cute knit tops, and I can't get enough of those to wear with shorts (and sew up my slightly ridiculous knits stash). The two-tone version is my favorite, but maybe this will be the year I'll try something one-shouldered.
M6362 - Ok, this jumpsuit seriously tempts me. I have nothing against jumpsuits in theory. I just doubt my fierceness and ability to pull it off without looking silly. I kind of want to make that halter-cowl version to wear out for drinks with my sisters at the beach, just to give them something to make fun of me about. The shorts version looks just so comfy and practical for summer, but I don't want to look like a toddler. Any fabric suggestions?
Finally, having a niece has gotten me very excited about making kids' things. I made her a little wardrobe (the evidence of which, iPhoto destroyed) which I sent to my sister. Hopefully we'll get a pic or two when her tiny angel grows into the clothes. M6344 is a little oneie with appliques. Nothing earth-shattering, but it's cute and I know I'll use it, so I'll probably pick it up. I'll probably even use the guitar for a tee for my guitar- and drum-obsessed 4-year-old.
There were some other cute dresses, too, but these 4 are my favorites. Plus, I have PLENTY of dress patterns waiting to be sewn up. Did I miss your favorites?
Saturday, April 30, 2011
Friday, April 29, 2011
Jeudi de Jardinage
It's been an exciting week. We drove (yes, 17 hours each way) to my parents' house in PA for less than 4 days to spend Easter with my parents and two sisters and their families. It was so wonderful to have all 7 of our little ones together. I managed to finish up my boys' knitted vests and pants the day before Easter, but that's for a separate post. I'll just give you a little teaser from my camera here, until I get the (hopefully) better shots from my mom.
In other news, my sweet Hubs left this morning for 4 months in a hot, sandy (but pretty safe, thank God) place. My little guy seems to be taking it pretty hard, since he doesn't really understand why Daddy isn't around for bedtime. It doesn't help that about three days ago, he decided to become a pretty serious "Daddy's boy."
Ok, on to the gardening progress:
Hubs has no real interest in gardening... I think he's pretty pleased that I've selected it as my newest hobby since it's relatively productive, as far as hobbies go, but I also know he fears me growing bored with it and having overgrown flower beds all over the yard. Ah, such is the fate of he who chose to marry me. Anywho, he came home from work one day with two gorgeous blossoms snatched from a coworker's bush and said he'd like to get this. I jumped at that little spark of interest and bought two big gardenia bushes. They are beautiful flowers and very fragrant, and they're supposedly perfect for my zone 9 Florida garden.
I wasn't going to plant veggies this year, but my big 4-year-old really wanted to, so I let each of the boys pick one type of seed. We planted carrots (left) and peas (right). The carrots aren't much to look at yet, but I'm hoping much of the work is being done underground still.
My little rose garden. I'm actually sniffing a few cut blooms here in a vase on my counter right now. :-D Makes me so happy.
Here is the flower bed I first showed here. I've dug a bit further, and they've been shooting up. The daisy bush still isn't blooming after all the flowers being picked off by my boys, but I've read this could also be because the roots are hard at work getting settled in its new spot.
I think calla lilies are my favorite flower. They grow in lots of colors and have such a unique, sculptural shape. Love 'em! I couldn't pass up this pre-planted pot (Costco, maybe?) that is flowering beautifully already.
See? I told you they were my favorites.
Friday, April 15, 2011
Nothing to see here
Really... there's nothing to see here. I took photos for a Jeudi de Jardinage post, which iPhoto ate AGAIN. Might be time to start thinking about a new computer. Right? Any supporters out there? I guess I could get a serger much cheaper, though.
Why do I never get a serger?? Another curiosity for another post.
Anyway, no photos. :-( I've been working on lots of blah. Lots of simple tunics for my church's Passion Play. A fishing game for the kids, which started out fun but now I'm ready to be finished with (and it's almost finished). I started curtains for the kitchen, and I'm fixing a quilt for a friend. Blah. I'm also in the middle of knitting sweater vests for my little men for Easter and I also want to sew them pants. I just want to be finished and make a cute silk flowered blouse for ME ME ME!!! Anyone else this selfish?
Thursday, April 7, 2011
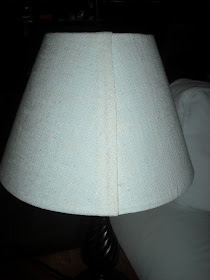
Lampshade Redo
So... I took photos of this whole process, but iPhoto ate them. Grrrrrr.
Anyway, it's not that complicated. This little project started when I saw a lovely linen lampshade for $30 or something like that. I bought the $7 plain white lampshade instead and brought it home. Then I found some coarse linen in my stash that was rougher than I expected it to be when I ordered it online. I rolled the lampshade along the linen and drew my "pattern, leaving about an inch on each side and extra for the seam. The resulting shape of fabric is kind of like a section of a big circle (this is where a photo would have been nice).
Then I used a good old glue stick to attach the fabric to the cheap lampshade. That's right - a plain old glue stick. It was really simple, not messy, and has held up for the month or so since I made this.
Here's the result:
Tuesday, April 5, 2011
Vogue 1174
I can't believe I finished this dress in a week! It was a lot of work, but I was excited about it from beginning to end (and truth be told, it still needs two hooks/eyes and hanging loops). I had some doubts about the fit and whether this style would flatter my (lack of) curves, but I'm thrilled with the result.
Here is my version of Vogue 1174:
I discussed in a previous post that I had to take in my usual size about 2 inches around the top. Other than that, fitting was ok.
I like the pockets, but forgot to really show them in the photos (working with a 4-year-old photographer here). I LOVE how the pleats on the skirt make it stand out swishily just enough to balance out the rigid top half. I think my body-ful linen/cotton fabric helps. It's from Gorgeous Fabrics, by the way, but long sold out.
Excuse the wrinkles, please. That's just life with linen.
I briefly considered attaching the skirt like any other dress pattern (right sides together) instead of this top-stitched on method, but then I decided that's just part of the interesting design and went with it. Sooooo glad I did that. It's just another interesting touch to the dress, like the "piping," which is actually just a strip of folded fabric - I don't think that is technically piping.
Here is my back zip, discussed at the end of this post.
Inside shots. This pattern has what looks to me to be very high-end construction methods with the foundation inside the lining with a waist stay. It's beautifully finished inside (again, just following the instructions).
Here it is, styled for Easter. I didn't plan to wear a belt with this dress, but once I put on the cardi, my waist disappeared, and I think the belt helps define it a bit.
Things are very classy here for photo shoots. I have a photographer AND a photography assistant to direct me.
Some photos of the man behind the lens.
Patter Review is here.
Friday, April 1, 2011
Jeudi de Jardinage
Welcome to Jeudi de Jardinage (Gardening Thursday)... yes, I know it's Friday, but we had tornadoes and stuff yesterday, so forgive this unceremonious beginning. I've been hard at work in my new garden here in Florida, so I thought I'd spend a post on Thursdays (maybe not EVERY Thursday) posting a little update of my Florida gardening learning curve.
This the beginning of a border bed by the backyard fence. That daisy bush is not doing very well thanks to over-harvesting by two sweet boys who like to bring me flowers. For the rest of the border on the right side of the gate, I'm planting bulbs and scattering a bunch of wildflower seeds from a big bag from Lowe's all around. I was a bit skeptical how this would work, but it's only been a week since I planted this section, and there is already lots of green poking through the mulch. Now I have another stretch to dig, mulch, and pound in that edging (the boys' favorite part, of course)...
In other news, here's the progress on my Easter dress. I'm still a bit concerned about it obliterating the small curves I have, but I love all of the details and the very professional result coming from this pattern.
Plus, I'm super-proud of my zipper insertion. All of the piping matches up thanks to this tutorial by Summerset.
You put in one side, then close the zipper and mark all the match points on the other half of the zipper. The pattern has you put in one side, then close and pin the other side. Same idea, but I can see how the zipper might shift after just pinning and with no visual reference after unzipping
Also, check out my spiffy new header. I'm quite pleased with myself, even though I spent the better part of an hour trying to figure out how to make the photo smaller with no luck. Time to call in the cavalry (techie husband). This is phase one of my blog re-vamp plan.
Thanks for visiting!