Thursday, January 27, 2011
Plaid Vest Update
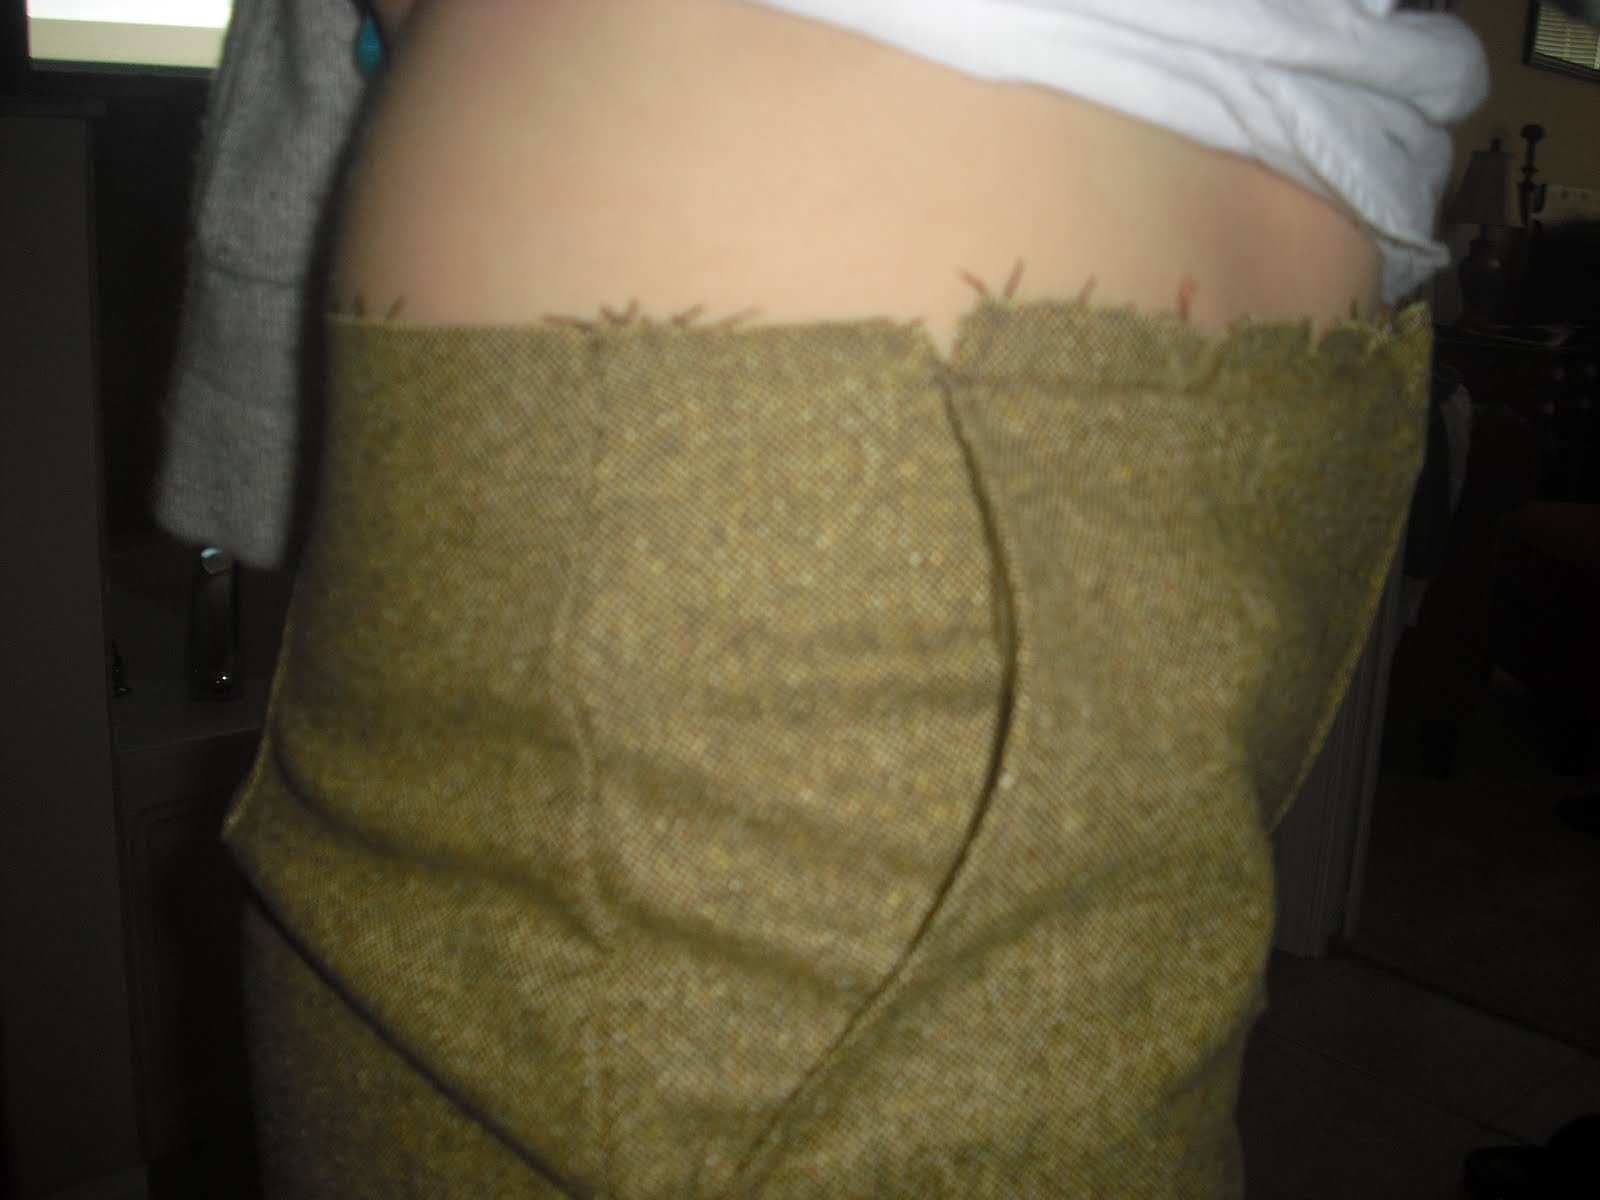
This is just a quick update on my plaid vest. I have the bulk of it assembled. Now it just needs a very good pressing before closing the side seams and hemming. Here it is, modeled by my lovely counter stool.

Sunday, January 23, 2011
Plaid Sew-Along at Sawyer Brook
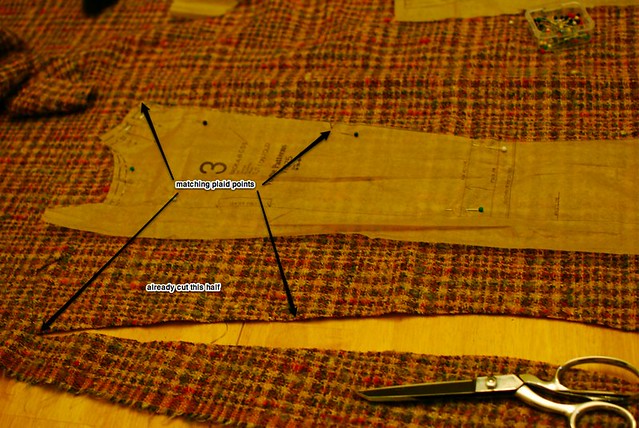
It's been a pretty nuts week, but I got back to sewing today. Well, I got back to cutting, to be more precise. I'm just starting a plaid sew-along at Sawyer Brook in which I'll make the wool vest I just started and a plaid cotton flannel shirt. I just put up a little post about cutting.
Here are two pics:

Here are two pics:

Saturday, January 15, 2011
Scarf-collar knit top
After reading on Debbie Cook's blog about her current inspiration (scroll way to the bottom of the post), I finally had inspiration for this lavender knit I've been stumped with for a while. In turn, Debbie's inspiration was from Lilian's "I'll Sew You", a new-to-me blog.
So, with proper credit given, here's my knock off interpretation of the original KnipMode pattern.

The fabric is Iris Jersey, a cotton spandex jersey from Sawyer Brook that is actually still in stock! Usually by the time I get to sewing up my purchases, they are long sold out. The pattern is my out-of-print TNT knit top pattern, Butterick 3344, and the collar is totally improvised.


I'd love to do this again in a nice sweater knit (if I had one), and I'm definitely going to do a lower-cut, sleeveless version soon. If anyone is interested, I'll make up a tutorial next time around on how I did the collar.
So, with proper credit given, here's my knock off interpretation of the original KnipMode pattern.
The fabric is Iris Jersey, a cotton spandex jersey from Sawyer Brook that is actually still in stock! Usually by the time I get to sewing up my purchases, they are long sold out. The pattern is my out-of-print TNT knit top pattern, Butterick 3344, and the collar is totally improvised.
I'd love to do this again in a nice sweater knit (if I had one), and I'm definitely going to do a lower-cut, sleeveless version soon. If anyone is interested, I'll make up a tutorial next time around on how I did the collar.
Thursday, January 13, 2011
McCalls 5857 Shorts
I made up some wool winter shorts with McCalls 5957. This was my first time making this pattern.

These shorts are part of my SWAP. It's funny. When I make these SWAPs, I usually whip up some tops quickly and then am stuck making all my bottoms last. Well, I only have one and a half bottoms to go this time (one is a super easy pair of leggings), and I've only made one top so far.
Stylistic aside: Two pairs of my boots recently were laid to rest - one pair due to cat urine... grrrrrr, and one just ripped apart at the side after 7 years of wear. The peed-on pair were my dark brown boots, which I would have preferred with the dark tights. I actually changed into some brown flats after the pictures. I don't really like how the light boots with the rest of the outfit. ANYWAY...

This pattern has a mock fly, which worked out fine, especially since I lined the shorts due to the scratchy wool. If I make this pattern again for unlined summer shorts, I'll make a true fly opening to finish the zipper nicely.

My only complaint (and it's more because of me than the pattern) is they are a bit too small and you can see some pull lines at the sides. My measurements have me between a size 12 and 14. However, I almost always make a 10. I prefer the ease and fit when I make a 10. So, I blindly cut a 10 on these, only taking a quick look at the finished hip measurement first. Well, I couldn't even get the waistband shut on the 10, so I recut one a few inches longer. The rest of the shorts fit ok (if a smidge snug), but the waistband was nowhere close. The top edge was supposed to be be eased in to the waistband (but they'd have to be almost "gathered" to that little waistband. Mine really have no easing into the larger waistband. They are totally flat. (make any sense) So, I guess if I'd started with a size 14, I'd be fine, but then the shorts may have been pretty baggy.

Also, these shorts are a bit higher rise than I prefer. You can see here, they come up to my belly button, almost at my true waist. I probably won't wear anything tucked in the waistband with this fit, which is a shame, because the waistband and belt loops came out nice! :-)

Here you can see the front and zipper better. I just loooove this beautiful wool fabric from Sawyer Brook (bought several years ago, so now sold out).

Here's the back. You can see one dart on each side. One final, minor change I'd make on another pair - add a welt pocket or two on the back. I just think back pockets make shorts look a little nicer and more expensive. Maybe that's just me. :-)

Pattern Review is here.

These shorts are part of my SWAP. It's funny. When I make these SWAPs, I usually whip up some tops quickly and then am stuck making all my bottoms last. Well, I only have one and a half bottoms to go this time (one is a super easy pair of leggings), and I've only made one top so far.
Stylistic aside: Two pairs of my boots recently were laid to rest - one pair due to cat urine... grrrrrr, and one just ripped apart at the side after 7 years of wear. The peed-on pair were my dark brown boots, which I would have preferred with the dark tights. I actually changed into some brown flats after the pictures. I don't really like how the light boots with the rest of the outfit. ANYWAY...
This pattern has a mock fly, which worked out fine, especially since I lined the shorts due to the scratchy wool. If I make this pattern again for unlined summer shorts, I'll make a true fly opening to finish the zipper nicely.
My only complaint (and it's more because of me than the pattern) is they are a bit too small and you can see some pull lines at the sides. My measurements have me between a size 12 and 14. However, I almost always make a 10. I prefer the ease and fit when I make a 10. So, I blindly cut a 10 on these, only taking a quick look at the finished hip measurement first. Well, I couldn't even get the waistband shut on the 10, so I recut one a few inches longer. The rest of the shorts fit ok (if a smidge snug), but the waistband was nowhere close. The top edge was supposed to be be eased in to the waistband (but they'd have to be almost "gathered" to that little waistband. Mine really have no easing into the larger waistband. They are totally flat. (make any sense) So, I guess if I'd started with a size 14, I'd be fine, but then the shorts may have been pretty baggy.
Also, these shorts are a bit higher rise than I prefer. You can see here, they come up to my belly button, almost at my true waist. I probably won't wear anything tucked in the waistband with this fit, which is a shame, because the waistband and belt loops came out nice! :-)
Here you can see the front and zipper better. I just loooove this beautiful wool fabric from Sawyer Brook (bought several years ago, so now sold out).
Here's the back. You can see one dart on each side. One final, minor change I'd make on another pair - add a welt pocket or two on the back. I just think back pockets make shorts look a little nicer and more expensive. Maybe that's just me. :-)
Pattern Review is here.
Tuesday, January 11, 2011
Shorts, cooking, and painting
This morning, I diligently took pictures of my newest complete garment, a pair of wool shorts. Unfortunately, I didn't want to drag my pint-sized photographer outside and didn't want to get out the nice camera and change the lens, and they came out very badly, so I'll be staging another photo shoot soon.
Until then, here's a quick look at the problem I had with pockets bagging out.

I simply unstitched the basting at the top of the pocket and pulled the front piece up about 3/8". Worked like a charm.

In other news, here's a lovely Florida tomato tart I made on Sunday night. Isn't it pretty? I got the recipe from a little booklet that was free with a local farm stand purchase of tomatoes. Unfortunately, my husband wasn't a huge fan of the spice mixture and texture, and the kids weren't crazy about it (and they're not generally picky eaters), so if I make it again, I'll definitely tweak it a bit. Kind of sad when your homemade pie crust and fresh, local produce culminate in a pretty, but not delicious ending.

Finally, here's a look at my kitchen walls. You may recall I had painted them bright green and then had second thoughts about the brightness. I ended up sponge-painting over all but the wall behind the cabinets with a lighter green. I'm happy with the results and am anxious to make the curtains. I'm not allowing myself to buy the fabric until I touch up the white trim, though. :-) (and that's my littlest ham, trying to find the perfect piece to complete his train track. He couldn't find it by rummaging, so I guess he had to get in and have a look.)
Until then, here's a quick look at the problem I had with pockets bagging out.
I simply unstitched the basting at the top of the pocket and pulled the front piece up about 3/8". Worked like a charm.
In other news, here's a lovely Florida tomato tart I made on Sunday night. Isn't it pretty? I got the recipe from a little booklet that was free with a local farm stand purchase of tomatoes. Unfortunately, my husband wasn't a huge fan of the spice mixture and texture, and the kids weren't crazy about it (and they're not generally picky eaters), so if I make it again, I'll definitely tweak it a bit. Kind of sad when your homemade pie crust and fresh, local produce culminate in a pretty, but not delicious ending.
Finally, here's a look at my kitchen walls. You may recall I had painted them bright green and then had second thoughts about the brightness. I ended up sponge-painting over all but the wall behind the cabinets with a lighter green. I'm happy with the results and am anxious to make the curtains. I'm not allowing myself to buy the fabric until I touch up the white trim, though. :-) (and that's my littlest ham, trying to find the perfect piece to complete his train track. He couldn't find it by rummaging, so I guess he had to get in and have a look.)
Saturday, January 8, 2011
Christmas jammies
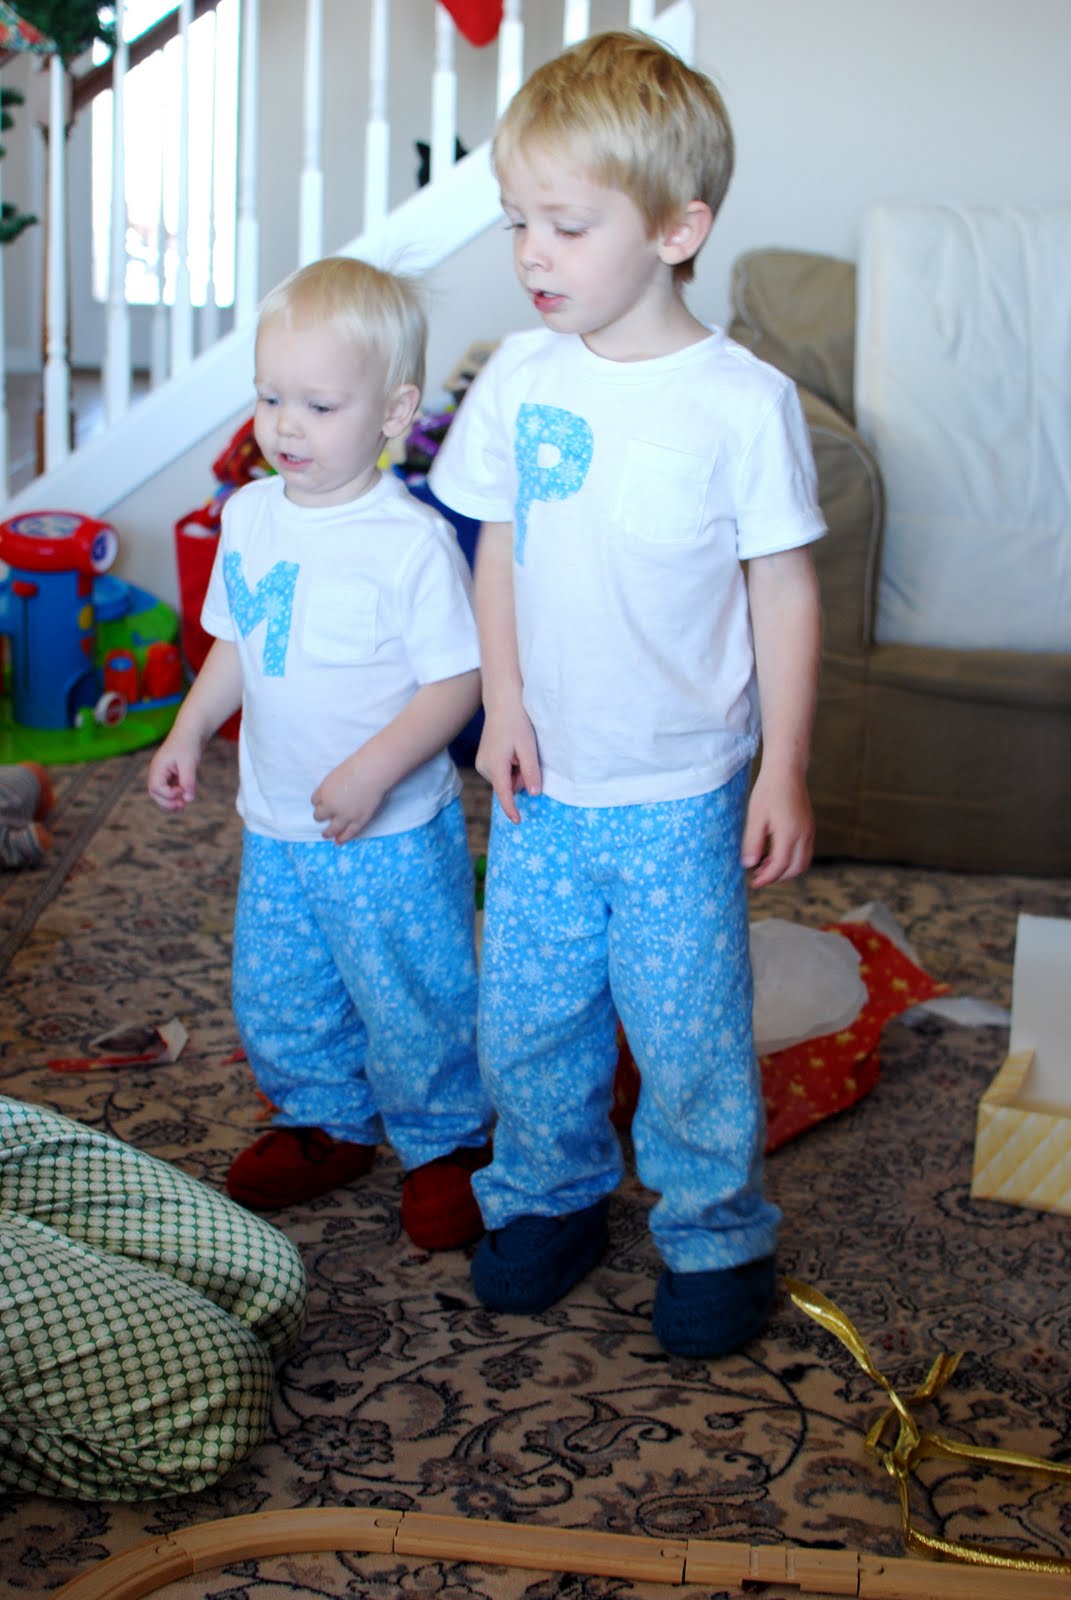
Last year, I bought our family matching Christmas jammies. They were not cheap, and my husband's and mine quickly shrunk so much that they are almost unwearable. The boys' got rediculously faded after the first washing (supposedly because of the fire-retardant fabric, but they have plenty of other pajamas that don't do that). ANYWAY, I decided that was silly. This year, I'd make us our own. You only get to see the boys' though, because mine were quickly drenched in coffee by an excited little boy, and my husband's came out too small, despite simply tracing a pair he has.


I simply appliqued the letters on purchased tee shirts. I used steam-a-seam sheets to attach the appliques, and then machine-stitched around the edge.
Tuesday, January 4, 2011
Florida trench
It didn't occur to me until recently that this is the perfect Florida jacket! It seams that white can be worn pretty much any time around here, and the light weight works well for the chilly mornings up to 60s in the afternoon that we've been having lately.

See my baby over there? He refuses to stop growing!
Subscribe to:
Posts (Atom)